
Best Garden Tips for Beginners
Starting a garden can be a rewarding and fulfilling experience. It allows you to connect with nature, grow your own fresh produce, and find solace in the therapeutic act of nurturing plants. Whether you have a spacious backyard or a small balcony, gardening provides a sense of accomplishment and a chance to create something beautiful. If you're new to gardening (or even if you have been gardening for years) here are some of the best garden tips you will need to succeed.
If you are looking for helpful advice on how to grow the best garden, contact us. We can also help you promote your gardening products or garden centre on our website. Talk to us today to get started.
Best Garden Tips
1. How to Choose the Perfect Location

As a beginner gardener, selecting the right location for your garden is crucial for successful plant growth. Here are some essential considerations:
A) Sunlight Exposure
Observe: Spend time observing your yard to identify areas that receive full sun (around 6-8 hours daily). South and west-facing spots usually get the most sunlight.
Importance: Most vegetables thrive in full sun, ensuring a bountiful harvest. Some plants can tolerate partial shade but prioritize sunny locations.
B)Drainage
Healthy Roots: Plant roots need water, but excessive moisture can lead to diseases and poor fruit production.
Choose a Flat Spot: Opt for a flat area with good drainage. Avoid low-lying spots prone to waterlogging.
Slope Considerations: While slopes aid drainage, too much slope can cause erosion and water loss. If planting on a slope, create horizontal rows.
C) Convenience
Accessibility: Choose a spot that’s easy to access. An out-of-sight garden can lead to neglected weeds and overripe crops.
Proximity to Water: Ensure your garden is close to a water source for convenient irrigation.
Avoid Obstacles: Avoid areas with obstacles like large rocks or tree roots.
D) Wildlife Protection
Fencing: If wildlife is active in your area, select a location that can be fenced. Chicken wire keeps out rabbits, while deer fences should be taller (7-8 feet).
Remember, your garden’s success begins with the right location.
2. Best Garden Tips for Preparing Your Soil

You can add compost to your soil to improve it - Photo by Zoe Schaeffer on Unsplash
Preparing your garden soil is a crucial step for successful plant growth. As a beginner, here are some tailored best garden tips based on different soil types:
A) Sandy Soil
Characteristics: Sandy soil drains quickly and lacks nutrients.
Tips:
Amend with Organic Matter: Mix in compost or well-rotted manure in sandy soil to improve water retention and nutrient content.
Mulch: Apply organic mulch (such as straw or wood chips) to reduce evaporation and protect against erosion.
Choose Drought-Tolerant Plants: Opt for plants that thrive in sandy soil, like succulents or lavender.
B) Clay Soil
Characteristics: Clay soil is heavy, compacted, and retains water excessively.
Tips:
Loosen the Soil: Use a fork or spade to break up compacted clay. Aim for at least 8 inches of depth.
Add Grit or Sand: Mix in coarse sand, vermiculite, or perlite to improve drainage.
Amend with Organic Matter: Incorporate compost or aged manure to enhance soil structure and nutrient availability.
Raised Beds: Consider planting in raised beds filled with well-draining soil mix.
C) Rocky Soil
Characteristics: Rocky soil contains large stones or gravel.
Tips:
Remove Large Rocks: Clear the area by removing large rocks and debris.
Use Raised Beds: Opt for raised beds or container gardening to avoid planting directly in rocky soil.
Amend with Topsoil: Add a layer of quality topsoil or garden soil to create a better planting surface.
Choose Hardy Plants: Select plants that can tolerate rocky conditions, such as sedums or alpine species.
D) Acidic or Alkaline Soil
The above video will further explain pH levels.
Characteristics: Use a soil test kit to determine soil pH. The pH scale goes from 0 to 14. A pH level of 7 means that it is neutral. As your pH level decreases from 7 to 0 that means that your soil is more acidic whereas as your pH level increases from 7 to 14, it means that it is more alkaline.
Tips:
Acidic Soil: Add lime to your soil to raise your pH level.
Alkaline Soil: Add sulphur to your soil to lower your pH level.
Choose Plants Wisely: Certain plants thrive in specific pH ranges. Research pH preferences for your chosen plants.
Remember, soil preparation is an investment in your garden’s success. Understanding your soil type and making necessary adjustments will lead to healthier plants and a more productive garden!
3. How Large Should You Make Your Garden?
As a beginner gardener, determining the size of your garden is an important decision. Here are some practical tips to guide you:
A) Start Small
Less Overwhelming: Begin with a modest garden size. A small plot allows you to learn and manage effectively without feeling overwhelmed.
10’ x 10’: Consider starting with a 10 feet by 10 feet area. It’s manageable and provides ample space for various plants.
B) Assess Your Available Space

When space is limited, you can grow plants in containers on a patio. Image by congerdesign from Pixabay
Backyard: If you have a backyard, evaluate the available space. Look for sunny spots with good soil quality.
Balcony or Patio: Even if you have limited space, container gardening on a balcony or patio is feasible. You can make the most of you limited space by using pots and vertical planters.
C) Consider Your Goals
Food Production: If your goal is to grow your own food, calculate how much you consume. A small garden can yield fresh produce.
Ornamental Garden: For flowers and aesthetics, focus on creating a beautiful space rather than a large one.
D) Time Commitment
Maintenance: Remember that larger gardens require more time and effort. Assess how much time you can dedicate to gardening and choose your size accordingly.
Start with Manageable: If you’re unsure, start with a smaller garden and expand gradually.
E) Crop Selection
Choose Wisely: Base your garden size on the types of crops you want to grow.
Spacing: Research the recommended spacing between plants. Some vegetables need more room than others. Most seed packages will tell you how much space you need to leave between plants. If you buy seedlings at a garden center, check the little plastic labels with this information on them.
4. How to Select What Vegetables to Plant

As a beginner gardener, selecting the right vegetables to plant is crucial for a successful growing season. Here are some practical tips to guide you:
A) Choose What You Like
Start by selecting vegetables that you and your family enjoy eating. There’s no point in planting something no one likes. Consider your preferences and culinary habits.
B) Be Realistic
Think about how many vegetables your family will realistically consume. Planting too much can lead to waste while planting too little might not yield enough for your needs.
C) Consider Availability
Take note of the vegetables available at your local grocery store. If certain veggies are readily accessible, you might want to focus on growing others that are less common or expensive.
D) Care Commitment
Be prepared to care for your plants throughout the growing season. Some vegetables require more attention than others. If you’re a busy gardener, opt for low-maintenance varieties.
E) Start with Easy-to-Grow Vegetables
Choose vegetables that are forgiving and straightforward to cultivate. Here are some excellent options:
Lettuce: Quick-growing and perfect for salads.
Radishes: Fast and rewarding.
Green Beans: Hardy and low-maintenance.
Peas: Great for trellises and delicious fresh.
Zucchini or Summer Squash: Thrive in warm weather.
Carrots: Sow directly into the soil.
Beets: Colourful and versatile.
Spinach or Kale: Nutrient-rich and easy to grow.
Remember, gardening is both rewarding and educational. Start small, learn as you go, and enjoy the journey!
5. Basic Gardening Tools You'll Need
As a beginner gardener, having the right tools can make your gardening experience more enjoyable and productive. Here’s a list of the best garden tools along with explanations for their importance:
A) Hand Trowel
A hand trowel is like a small, sturdy shovel. It’s essential for various gardening tasks.
Uses and Benefits:
Planting and Transplanting: Use it to dig small holes for seeds, and bulbs, or transplant small plants.
Weeding: Its pointed tip and sharp edge help uproot weeds around delicate plants.
Mixing Soil and Adding Fertilizers: Handy for incorporating fertilizers or compost into the soil.
Potting: Ideal for precise control when potting or repotting plants.
Aerating Soil: Gently aerate the soil for better water and nutrient absorption.

B) Garden Gloves
A good pair of garden gloves will protect your hands from blisters, thorns, and dirt.
Uses and Benefits:
Handling Rough Material: Useful when dealing with wood chips, rocks, or heavy tools.
Weeding and Pruning: Provides protection during weeding and pruning tasks.
Transplanting and Potting: Keeps your hands clean while handling soil and potting mixtures.
Pest and Disease Protection: Acts as a barrier against harmful pests and plant diseases.
Water Resistance: Some gloves are water-resistant for wet soil or watering.

C) Pruning Shears (Secateurs)
Pruning shears, also known as secateurs, are essential for trimming and shaping plants.
Uses and Benefits:
Trimming: Prune overgrown branches, dead leaves, and stems.
Shaping Plants: Maintain a neat appearance by shaping shrubs and bushes.
Harvesting: Use them to harvest herbs, flowers, and small fruits.
Precision Cutting: Their sharp blades allow precise cuts.

D) Rake
A rake helps level soil, remove debris, and prepare the ground for planting.
Uses and Benefits:
Clearing Leaves and Debris: Rake fallen leaves, grass clippings, and other garden waste.
Loosening Soil: Prepare the soil surface for planting or seeding.
Levelling Soil: Even out soil in garden beds or around plants.

E) Hoe
A hoe is excellent for breaking up soil, removing weeds, and cultivating.
Uses and Benefits:
Weeding: Easily cut through weeds just below the soil surface.
Aerating Soil: Loosen compacted soil to improve drainage and root growth.
Creating Furrows: Use it to make planting furrows for seeds or seedlings.

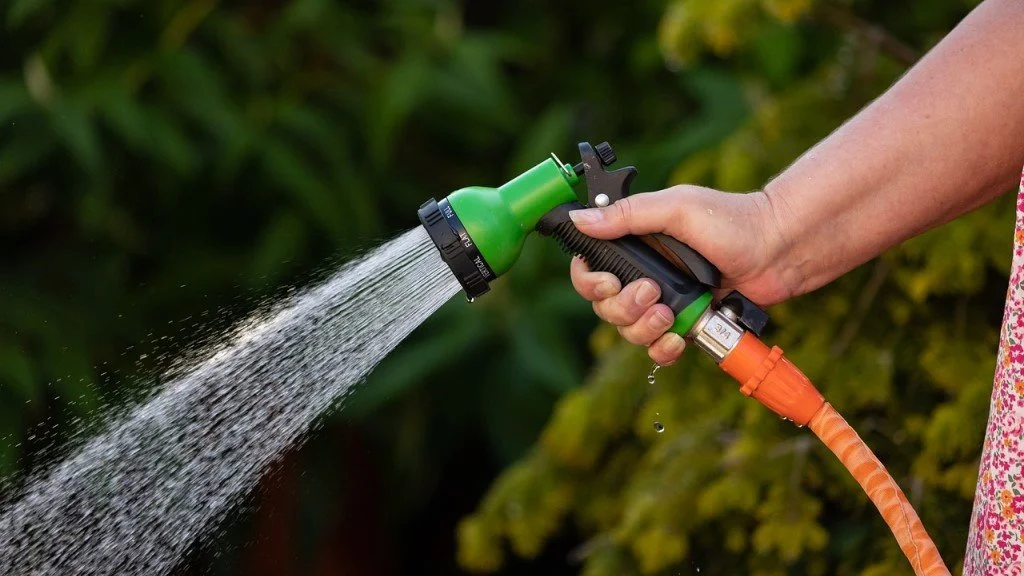
F) Water Hose with Adjustable Nozzle
Proper watering is crucial for plant health, so you should invest in a good water hose.
Uses and Benefits:
Watering Plants: Adjust the nozzle for gentle or strong water flow.
Cleaning Tools and Surfaces: Rinse garden tools, pots, and pathways.
Filling Watering Cans: Use it to fill your watering cans efficiently.

G) Wheelbarrow
A wheelbarrow helps transport soil, mulch, plants, and other heavy items.
Uses and Benefits:
Moving Heavy Materials: Easily carry soil, compost, or garden debris.
Plant Transportation: Transport potted plants or bags of mulch.
Efficient Work: Saves time and effort compared to carrying by hand.

Investing in quality tools will pay off in the long run. Start with these basics, and as you gain experience, you can expand your collection.
6. Planting and Caring for Your Seedlings
Here are some essential tips for planting and caring for seedlings as a beginner gardener:
A) Select Healthy Seedlings

Don’t use seedlings that are leggy. Image by congerdesign from Pixabay
If you are purchasing seedlings from a garden centre, choose ones that are healthy, disease-free, and have strong stems and leaves. Avoid leggy or spindly seedlings, as they may struggle to thrive.
B) Plant at the Right Time
Plant seedlings at the right time based on your local climate and growing season. Follow the recommended planting dates for each type of vegetable or flower you are growing. For most plants, you will need to wait until after the last frost in your area to plant your seedlings outside.
C) Plant at the Right Depth
Dig a hole slightly larger than the seedling’s root ball. Place the seedling in the hole, making sure the top of the root ball is level with the soil surface. Backfill with soil and gently pat it down.
D) Water Thoroughly
Water the seedlings immediately after planting to settle the soil around the roots. Keep the soil consistently moist but not waterlogged. Water at the base of the plant to avoid wetting the leaves.
A good trick is to pour some water into the hole that you have dug for your seedling before placing it in the ground. That way you know that the roots will have sufficient water.
E) Provide Sunlight
Most seedlings need at least 6 hours of direct sunlight per day. Place them in a sunny spot or use grow lights if you are starting your own seedlings indoors.
F) Protect from Extreme Weather
Shield seedlings from strong winds, heavy rain, or frost. Use cloches or row covers if necessary.
G) Fertilize Wisely
Start with a balanced, water-soluble fertilizer. Make sure you follow the recommended dosage on the label and avoid over-fertilizing, as it can harm seedlings.
H) Thin Seedlings

Thin out your seedlings to give your plants more space to grow. Image by onehundredseventyfive from Pixabay
If you’ve planted multiple seedlings close together, thin them out. This step can be one of the hardest for beginner (and seasoned) gardeners. This is where tough love comes into gardening. You need to pull out the smaller and less healthy-looking seedlings and leave only the healthiest and strongest plants to grow.
I) Harden Off Seedlings
If you have started your plants indoors, gradually acclimate seedlings to outdoor conditions before transplanting. Place them outside for a few hours each day, increasing the time gradually before planting them in your garden.
Remember, patience and observation are key. As you care for your seedlings, you’ll learn more about their specific needs and become a confident gardener!
7. Watering Advice
Watering is a critical aspect of successful gardening. Here are some essential watering tips so you can have the best garden possible:
A) Know Your Plants
Different plants have varying water requirements. Research the specific needs of each type of plant you’re growing. Some like it consistently moist, while others prefer drier conditions.
B) Water Deeply and Infrequently
Instead of frequent shallow watering, aim for deep watering sessions. Water thoroughly to encourage roots to grow deeper into the soil. Allow the top inch or two of soil to dry out between waterings. Insert your finger into the soil to check moisture levels. If it feels dry beyond the top inch, it’s time to water.
Overwatering can suffocate plant roots. Ensure proper drainage to prevent waterlogged soil.
C) Morning Watering
Water your plants in the morning whenever possible. Morning watering allows foliage to dry during the day, reducing the risk of fungal diseases.
D) Avoid Overhead Watering
Water at the base of the plants rather than overhead. Overhead watering can lead to leaf diseases and wastage.
If possible, use a soaker hose or drip irrigation. Soaker hoses or drip irrigation systems deliver water directly to the soil and they minimize water loss due to evaporation and ensure efficient use of your water.
E) Observe Signs of Thirst
Learn to recognize when your plants need water. Wilting leaves, dry soil, and yellowing foliage are signs of thirst.
Adjust your watering based on the weather. If you are experiencing hot, windy days you will need to water more frequently. During cooler or rainy periods, you can reduce your watering.
F) Mulch Around Plants
Apply organic mulch (such as straw or wood chips) around the base of plants. Mulch helps retain moisture, suppress weeds, and regulate soil temperature.
G) Container Plants Need Extra Attention
Remember that potted plants dry out faster than those in the ground. Check container soil moisture regularly and water accordingly.
H) Be Consistent
Establish a watering routine and stick to it. Consistency can help your plants thrive. Remember, practice and observation will help you fine-tune your watering habits.
8. Fertilizing - How and When
Watch the above video to learn how fertilizers work.
Fertilizing your plants is essential for their growth, health, and productivity. As a beginner gardener, understanding the basics of fertilization will help you nurture thriving plants. Here’s what you need to know:
A) Why Fertilize?
Nutrient Boost: Fertilizers provide essential nutrients that plants need for photosynthesis, root development, and overall vitality.
Soil Enrichment: Fertilizing improves soil fertility, especially in depleted or nutrient-poor soils.
Promotes Flowering and Fruit Production: Proper nutrients encourage blooming and fruiting of plants.
B) Types of Fertilizers
Chemical (Synthetic) Fertilizers:
These are commercially produced and contain specific ratios of nitrogen (N), phosphorus (P), and potassium (K). Quick-release formulas provide rapid results but can harm soil health if overused.
Organic Fertilizers:
Organic options are derived from natural sources and are gentler on the environment. They release nutrients slowly, promoting long-term soil health.
Here are some examples of organic fertilizers:
Compost: Rich in organic matter, compost improves soil structure and provides a balanced nutrient mix. It is also a great, cost-effective and environmentally friendly way to reuse your food and yard waste.
Manure: Well-rotted animal manure (such as cow or chicken manure) adds nitrogen and organic matter.
Fish Emulsion: Fish emulsion is a liquid fertilizer made from fish waste, which is high in nitrogen.
Bone Meal: Bone meal contains phosphorus for strong root development.
Seaweed or Kelp Extract: These types of fertilizer will provide your plants with trace minerals and growth hormones.
C) How to Apply Fertilizer
Read Labels: Follow package instructions for synthetic fertilizers.
Organic Options:
Compost: Mix compost into the soil before planting or as a top dressing around established plants.
Manure: Apply manure in fall or early spring, mixing it into the soil.
Liquid Fertilizers: Dilute and apply during the growing season.
Bone Meal: Sprinkle around the base of plants.
Seaweed Extract: Use as a foliar spray or soil drench.
D) Tips for Success
The following are some of the best garden tips to remember when fertilizing:
Balance: Aim for a balanced N-P-K ratio (e.g., 10-10-10) for most plants.
Timing: Fertilize during the growing season (spring and summer).
Water After Application: Water helps nutrients reach plant roots.
Avoid Over-Fertilizing: Excess can harm plants and leach into groundwater.
Remember, healthy soil leads to healthy plants. Experiment with different fertilizers and observe how your plants respond.
9. How to Control the Weeds

Weeds can be a persistent challenge for gardeners, but there are effective organic methods to keep them in check. Here’s how to manage weeds without resorting to chemical herbicides:
A) Mulching
Method: Apply a layer of organic mulch (such as straw, wood chips, or leaves) around your plants.
Benefits:
Suppresses weed growth by blocking sunlight.
Retains soil moisture.
Improves soil structure as the mulch breaks down.
B) Hand-Pulling
Method: Regularly inspect your garden and pull out weeds by hand.
Benefits:
Precise removal of weeds, including their roots.
No chemicals are involved.
Good exercise!
C) Smothering
Method: Use cardboard, newspaper, or landscape fabric to cover areas with persistent weeds.
Benefits:
Prevents sunlight from reaching weeds, causing them to die off.
Eco-friendly and inexpensive.
D) Vinegar Solution
Method: Mix equal parts white vinegar and water in a spray bottle.
Application: Spray directly on weeds, especially in cracks or between pavers.
Benefits:
Acetic acid in vinegar kills weeds.
Use caution near desirable plants.
E) Boiling Water
Method: Pour boiling water over weeds.
Benefits:
Instantly kills weeds without chemicals.
Ideal for driveways or paths.
F) Corn Gluten Meal
Method: Apply corn gluten meal (a natural byproduct of corn processing) to soil.
Benefits:
Prevents weed seeds from germinating.
Safe for plants and animals.
G) Plant Cover Crops
Method: Sow cover crops (such as clover or buckwheat) in bare areas.
Benefits:
Competes with weeds for space and nutrients.
Improves soil health.
H) Hand Tools
Method: Use hand tools like hoes, weeders, and cultivators to remove weeds.
Benefits:
Targeted weed removal.
No chemicals are required.
Remember, consistent weed management is essential. Combine these methods to create a weed-free, organic garden.
10. Harvesting and Enjoying the Fruits (and Veggies) of Your Labour

Here are some of our best garden tips for harvesting your crops:
A)Timing Matters
Why?: Harvesting at the right time ensures optimal flavour, texture, and nutrient content.
Colour and Texture: Observe colour changes (e.g., tomatoes turning red) and feel the texture (e.g., firmness).
Early Morning: Harvest in the morning when plants are hydrated but not stressed by heat.
B) Use Sharp Tools
Why?: Clean cuts promote faster healing and reduce the risk of disease transmission.
What Tools?
Scissors or Pruners: Use sharp, clean tools to avoid damaging stems.
Avoid Tearing: Tearing can harm plant tissues.
C) Harvesting Leafy Greens and Herbs
Why?: Regular harvesting encourages continuous growth and prevents bitterness.
How?
Outer Leaves First: Harvest outer leaves of lettuce, spinach, and herbs.
Pinch or Cut: Pinch off or cut leaves near the base.
D) Harvesting Tomatoes and Peppers

Only harvest your tomatoes when they are fully red.
Why?: Proper ripeness ensures better taste and texture.
When to Harvest?
Fully Coloured: Tomatoes should be fully red (or their specific colour) and peppers should also be their specific colour.
Firmness: Gently twist to detach from the plant.
E) Root Vegetables
Why?: Harvesting at the right time ensures optimal flavour and texture.
How?
Lift Gently: Use a fork or your hands to lift root vegetables (carrots, beets, radishes) from the soil.
Remove Excess Soil: Shake off excess soil.
Store with Tops Removed: Trim off greens before storage.
F) Berries
Why?: Ripe berries are sweet and flavorful.
How?
Fully Ripe: Harvest when berries are fully coloured and easily detach from the stem.
Handle Delicately: Berries bruise easily, so handle them gently.
G) Beans and Peas
Why?: Regular picking promotes more flowering and fruiting.
When to Harvest?
Young Pods: Harvest beans and peas when pods are young and tender.
Regularly: Frequent picking encourages continuous production.
Remember, each plant has its unique harvesting requirements. Pay attention to individual cues, and enjoy the fruits (and veggies) of your labour!
Get the Best Garden Tips and More from HowtoGardenz

Stumped on squash seedlings or wilting wildflowers? Fear not, weary gardener! Welcome to Gardenz, your ultimate sanctuary for all things green. Whether you’re a seasoned seed sower or a curious sprout, our vibrant community connects you with the answers, products, and pros you need to cultivate your garden dreams.
Ask Our Friendly Experts anything – from fickle figs to finicky fertilizers – and unearth a treasure trove of tips, tricks, and troubleshooting. Explore our curated marketplace teeming with tools, seeds, and soil to nurture your leafy little (or not-so-little) loves.
Are you eager to share your own expertise or showcase your flourishing nursery? Gardenz welcomes you with open arms (and trowels)! List your products or services and connect with fellow plant enthusiasts to share the joy of growing.
So, come on in, grab a virtual gardening glove, and let Gardenz help your green thumb blossom!